Why Does Instagram Ruin Photo Quality?
Why does Instagram ruin photo quality? Instagram compresses every photo you upload. It resizes images to a maximum of 1080 pixels wide and re-encodes them as JPEG at roughly 85% quality. That single process strips fine detail, softens textures, and introduces visible artifacts — especially in gradients and shadow areas.
But here is the part most people miss: Instagram does not ruin your quality. You just export files Instagram was never designed to handle. Upload a 6000 px RAW-converted JPEG, and the platform has to crush it down by more than 80%. Upload a properly sized 1080 px file in sRGB, and the difference between your original and the published version is barely noticeable.
As one Instagram creator put it: the problem often is not Instagram's compression — it is uploading files Instagram was not designed to handle. According to Instagram's photo specifications, the platform supports widths between 320 and 1080 pixels, and anything outside that range gets forcibly resized.
In our experience helping creators optimize content since 2013, the most common cause of blurry uploads is incorrect export settings — not the platform itself. This guide breaks down exactly how compression works across feed posts, Stories, DMs, and Reels, then gives you the export settings that preserve maximum sharpness. If your feed looks washed out, your account might also benefit from understanding why your Instagram account looks dead.
How Does Instagram Compression Actually Work?
Instagram compression works through a four-stage pipeline that every uploaded photo passes through before anyone sees it. Understanding each stage of Instagram's image quality processing explains exactly where quality loss happens — and where you can prevent it.
Stage 1: Resize
The app checks your image dimensions. Anything wider than 1080 pixels gets downscaled to 1080 px. Anything narrower than 320 px gets upscaled. Both operations lose sharpness, but downscaling from a massive file causes the worst degradation because the algorithm must discard thousands of pixels worth of detail in a single pass.
Stage 2: Re-Encode
After resizing, Instagram re-encodes the image as lossy JPEG at approximately 85% quality. Even if you uploaded a JPEG, it gets re-encoded again. This double compression introduces generation loss — the same type of degradation you see when saving a JPEG repeatedly in Photoshop. On newer devices, Instagram may serve the image in WebP format to reduce file size further.
Stage 3: Color Convert
Instagram converts all color profiles to sRGB IEC61966-2.1. If your phone captured in Display P3 — which covers roughly 25% wider color gamut than sRGB according to Apple's Display P3 documentation — those extra colors get clipped. Vibrant reds, deep greens, and saturated blues are the first casualties.
Stage 4: CDN Delivery
The final file is pushed to Meta's global CDN network. Meta has been investing in AI-powered image optimization to balance quality and performance across its platforms. Depending on the viewer's connection speed and device, Instagram may serve an even more compressed variant. Users on slow mobile data receive lower-quality versions automatically.
| Stage | What Happens | Quality Impact |
|---|---|---|
| Resize | Downscale to max 1080 px wide | High — discards pixel data |
| Re-encode | Lossy JPEG at ~85% quality | Medium — generation loss artifacts |
| Color convert | Force sRGB from Display P3 / Adobe RGB | Medium — mutes vibrant colors |
| CDN delivery | Adaptive quality based on connection | Variable — worst on slow networks |
Key fact: AVIF achieves 30-50% smaller file sizes compared to JPEG at the same visual quality, according to Google's AVIF image format guide. Meta has been gradually adopting AVIF across its platforms since 2024, which means Instagram's pipeline will likely become more efficient — but the fundamental resize and re-encode steps remain.
The takeaway is straightforward. Instagram compression will always re-encode your photo and reduce image quality to some degree. You cannot avoid it. But you can minimize the damage by uploading files that are already close to Instagram's target specs — so the compression pipeline has less work to do.
Why Are Instagram Stories Lower Quality Than Feed Posts?
Stories look worse than feed posts because Instagram compresses them more aggressively. While feed photos cap at 1080 px wide with JPEG encoding, Stories are re-encoded as video containers at a variable bitrate between 1.2 and 2.5 Mbps — even when the Story is a still image. That lower bitrate ceiling explains why photo quality in Stories consistently looks softer than the same image posted to your feed.
The target resolution for Stories is 1080 x 1920 pixels (9:16 aspect ratio). Upload anything that does not match this ratio, and Instagram crops or scales to fit, adding another layer of quality loss on top of the compression.
Does Adding Music or Stickers Reduce Story Quality?
Yes — every overlay you add forces Instagram to re-encode the entire frame. Music, stickers, text, GIFs, polls, and countdown timers each trigger a separate re-encoding pass. Stack three or four elements on a single Story slide, and the cumulative quality loss becomes obvious: edges blur, gradients band, and fine text becomes hard to read.
Reddit users in r/photography frequently report that their high-resolution photos look "washed out" after uploading to Stories. The root cause is almost always this stacking effect combined with the low base bitrate.
Pro Tip: Build your Story slides in an external editor like Canva or Photoshop at exactly 1080 x 1920 pixels. Add all text, stickers, and overlays there. Then upload the finished flat image to Instagram without adding any in-app elements. This limits compression to a single pass instead of multiple re-encoding cycles.
- Export at exactly 1080 x 1920 px (9:16)
- Add text and stickers in your editor, not in-app
- Use H.264 MP4 at 6-8 Mbps for video Stories
- Upload over Wi-Fi to avoid mobile data compression
Does Instagram Reduce Photo Quality in DMs?
Yes, Instagram reduces photo quality in DMs more than anywhere else on the platform. Direct message photos are encoded at roughly 720p resolution and compressed to just 200-300 KB per image. The platform prioritizes delivery speed and end-to-end encryption over visual fidelity, which means DM photos are noticeably softer than the same image posted to your feed.
This aggressive compression exists by design. DMs need to load instantly across all connection types — including slow 3G networks in emerging markets. Instagram treats DM images as disposable previews rather than permanent portfolio pieces, so the quality tradeoff favors speed.
How to Send Higher Quality Photos in DMs
Instagram introduced a "Send in HD" toggle that reduces — but does not eliminate — DM compression. When enabled, the app uploads a higher-resolution variant that stays closer to the original. You can find this option by tapping the HD icon in the DM photo picker before sending.
For brand visuals, product photos, or anything that needs to arrive pixel-perfect, skip DMs entirely. Send a cloud storage link (Google Drive, Dropbox, or iCloud) so the recipient downloads the original file without any Instagram processing. If you are also wondering about privacy when sharing media in DMs, check whether does Instagram notify screen recording applies to your situation.
Pro Tip: For client approvals or portfolio sharing, paste a Google Drive or Dropbox link into the DM instead of attaching the photo directly. The recipient gets the full-resolution file without any compression.
Why Do Instagram Highlights Look Blurry Over Time?
If you have ever wondered why does Instagram ruin photo quality in Highlights specifically, the answer is double compression. Highlights degrade because they go through compression twice — once when you post the Story and again when Instagram archives it for long-term storage. That double pass strips away sharpness that was already borderline after the first round.
When a Story expires after 24 hours and moves into your Highlights reel, Instagram runs a secondary transcoding pass. The platform converts the already-compressed Story file into an optimized MP4 container designed for efficient long-term storage. This second encoding pass removes additional detail that survived the initial Story compression.
CDN cache refreshes make things worse over time. Instagram periodically re-optimizes stored media to match current bandwidth targets and device profiles. Each refresh cycle can shave off a fraction more quality — which is why a Highlight from six months ago often looks noticeably softer than one saved last week.
Pro Tip: Re-upload your most important Highlights from the original source files every 2–3 months. Post the Story again from the high-resolution original, then immediately add it to your Highlight reel. This resets the compression baseline and keeps your profile looking sharp.
The quality gap is most visible on text-heavy Stories. Small fonts, fine lines, and gradient backgrounds suffer the most from double compression. If your brand relies on Highlights for evergreen content like Q&A pages or product catalogs, consider designing Story frames with bold text and high-contrast visuals that hold up better through multiple encoding passes.
How to Upload Photos to Instagram Without Losing Quality
Understanding why does Instagram ruin photo quality is the first step — now here is the fix. The single most effective solution is matching your export settings to Instagram's exact specifications before you upload. When your file already meets the platform's target dimensions and format, Instagram applies minimal re-encoding — preserving up to 90% of original sharpness.
We've found that creators who follow these export settings consistently get sharper results than those who rely on Instagram's automatic resizing. Here is the step-by-step process:
- Open your photo in an editor — Lightroom, Snapseed, or VSCO all work
- Resize to 1080 pixels wide — for portrait (4:5), use 1080 × 1350 pixels
- Convert to sRGB color profile — this prevents Instagram from flattening your colors
- Export as JPEG at 85–90% quality — higher than 90% adds file size without visible benefit
- Compress the file to ~1.5 MB — use TinyPNG or similar tools to reduce size without visible quality loss
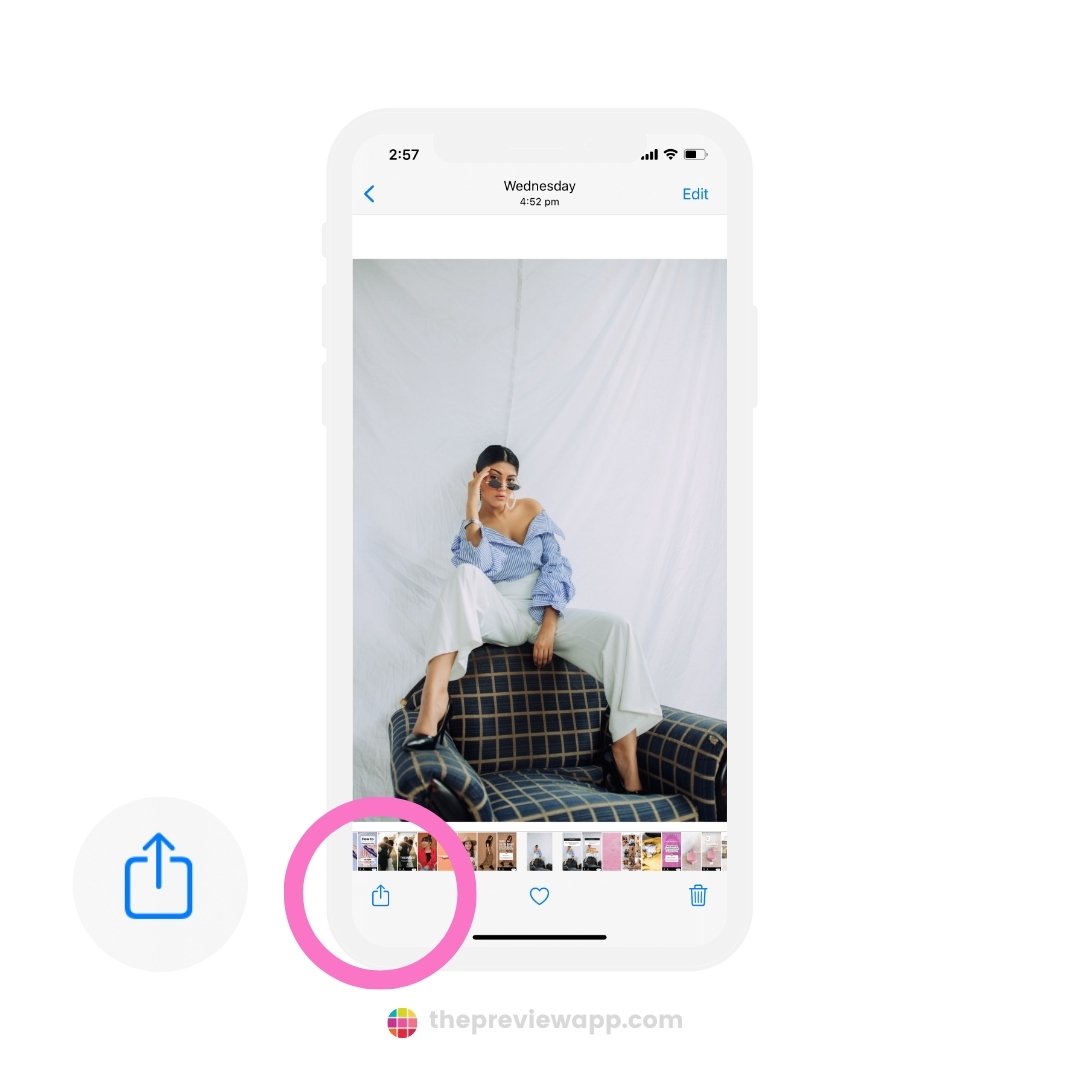
- Transfer to your phone without compression — use AirDrop, Google Drive, or USB (not messaging apps)
- Upload over Wi-Fi — slow connections trigger extra compression on Instagram's side
If you are new to the platform, our complete beginner's guide to Instagram covers the upload process from account setup to first post.
Best Export Settings for Instagram Feed
| Spec | Recommended Value |
|---|---|
| Width | 1080 px (exact) |
| Aspect ratio | 4:5 portrait (1080 × 1350) or 1:1 square (1080 × 1080) |
| Format | JPEG (.jpg) |
| Quality | 85–90% |
| Color profile | sRGB IEC61966-2.1 |
| File size | 1–2 MB (sweet spot ~1.5 MB) |
| DPI/PPI | 72 (screen standard) |
How to Enable "Upload at Highest Quality"
Instagram added a built-in quality toggle that reduces compression on your uploads. According to Instagram's image resolution help page, this option preserves more detail at the cost of slightly longer upload times and more data usage.
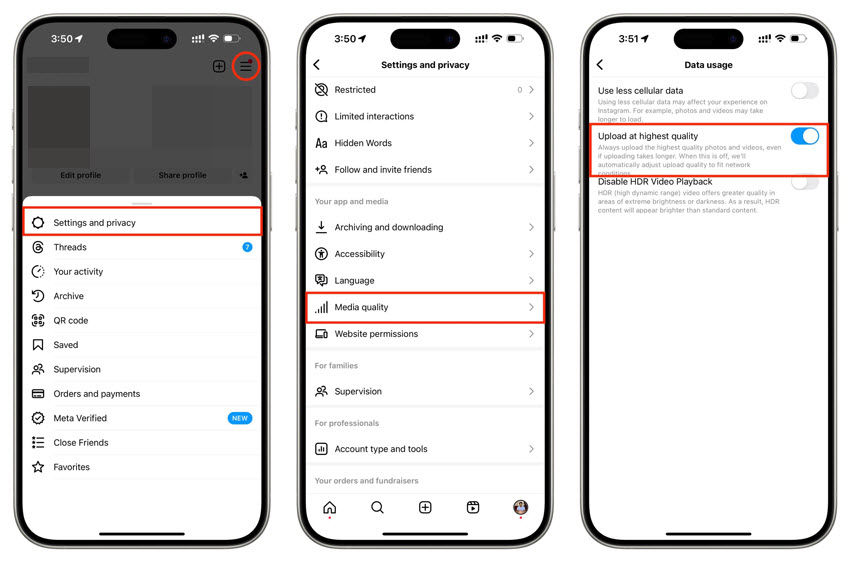
To enable it:
- Open Instagram and go to your Profile
- Tap the three-line menu (top right)
- Go to Settings and Privacy
- Tap Account → Data Usage
- Toggle on Upload at Highest Quality
This setting applies to both photos and videos. Keep in mind that it uses more mobile data, so uploading over Wi-Fi is still the best practice.
Pro Tip: Pre-compress your photo with TinyPNG before uploading. This removes invisible metadata and redundant data, giving Instagram's encoder less to strip away — resulting in a cleaner final image on the platform.
Pre-Upload Quality Checklist
- Width is exactly 1080 pixels
- Aspect ratio is 4:5 (1080 × 1350) for maximum feed space
- Color profile is sRGB (not Display P3 or Adobe RGB)
- File format is JPEG at 85–90% quality
- File size is under 2 MB (ideally ~1.5 MB)
- Transferred to phone without compression (AirDrop, USB, or cloud)
- Connected to stable Wi-Fi before uploading
- "Upload at Highest Quality" is enabled in Settings
Does Photo Quality Differ on iPhone vs Android?
Yes — iPhones and Android phones handle color profiles differently, and that gap is the main reason the same photo can look vibrant on one device and flat on the other after uploading to Instagram.
The core issue is color space. iPhones capture photos in Display P3, a wide color gamut that covers roughly 25% more colors than sRGB. Instagram converts every upload to sRGB. That conversion clips the extended color range, muting vibrant reds, greens, and blues that looked punchy on your iPhone screen.
Android phones vary far more by manufacturer. Samsung, Google Pixel, and OnePlus each use their own camera processing pipelines. Some shoot natively in sRGB, which means less color shift after upload. Others apply aggressive post-processing — sharpening, saturation boosts, HDR tone mapping — that can clash with Instagram's own re-encoding and produce unexpected artifacts.
iPhone vs Android: Instagram Quality Comparison
| Factor | iPhone | Android |
|---|---|---|
| Color profile captured | Display P3 (wide gamut) | Varies — sRGB or vendor-specific |
| Default photo resolution | 4032 × 3024 (12MP) or higher | 4000 × 3000 to 12000 × 9000 (varies) |
| Common quality issue | Colors look muted/flat after upload | Inconsistent sharpness, over-processing artifacts |
| Root cause | P3 → sRGB conversion clips ~25% of color range | Varied camera APIs, some upscale/downscale unpredictably |
| Fix | Export in sRGB via Lightroom or VSCO before uploading | Disable HDR, shoot in Pro/Manual mode at sRGB |
iPhone users: Force your export to sRGB in Lightroom or VSCO before uploading. In Lightroom Mobile, go to Export Settings → Color Space → sRGB. This prevents Instagram from doing the conversion — and you keep control over how colors shift.
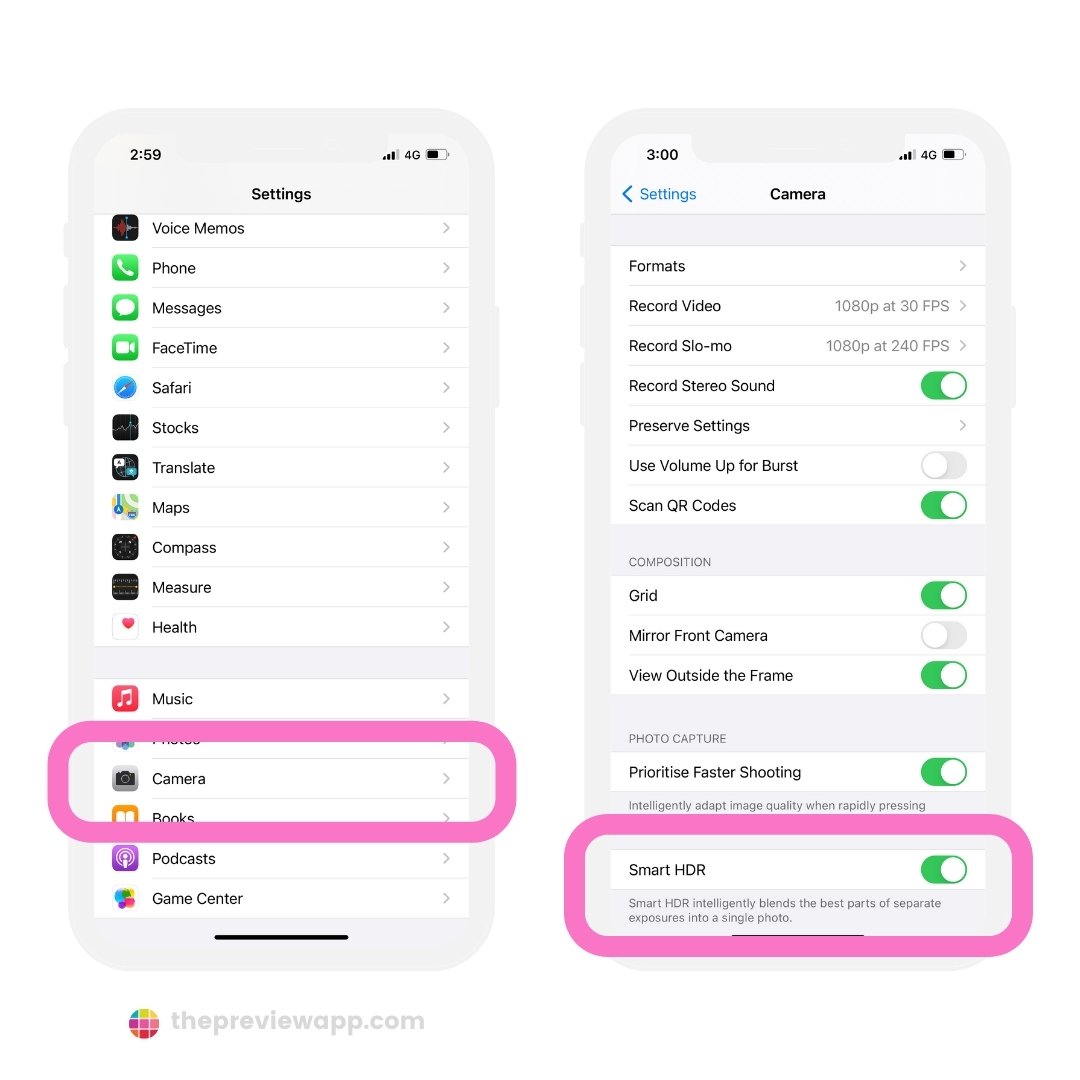
Android users face a different challenge. Because manufacturers customize the camera stack heavily, there is no single fix. The most reliable approach is shooting in your camera app's Pro or Manual mode, which typically outputs closer to sRGB. Avoid using manufacturer-specific "AI scene optimization" features, as these add processing layers that compound with Instagram's compression.
In our experience working with creators across both platforms, iPhone users see the biggest improvement from the sRGB export fix alone. Android users benefit more from reducing their source file size and disabling in-camera enhancements before uploading.
What About Instagram Reels — Does Video Quality Get Ruined Too?
Reels go through the same compression pipeline as Stories, but with higher bitrate ceilings — which means video quality is better than Stories yet still noticeably reduced from your original file. Instagram's help page on Reel dimensions and aspect ratios confirms the platform re-encodes every uploaded video.
Published Reels are typically re-encoded at 3–6 Mbps, compared to the 1.2–2.5 Mbps range for Stories. That extra bandwidth preserves more motion detail and reduces blocky artifacts in fast-moving scenes. Still, if you upload a video encoded at 15–20 Mbps from your editing software, Instagram will strip away 60–80% of that data.
The quality difference between a well-exported Reel and a carelessly uploaded one is dramatic. Text overlays are the clearest test — thin fonts and small text become unreadable mush at low bitrate, while properly exported Reels keep text crisp enough to read at a glance.
The best export settings for Reels in 2026:
- Resolution: 1080 × 1920 pixels (9:16 vertical)
- Codec: H.264 (MP4 container)
- Bitrate: 8–12 Mbps (gives Instagram room to compress without visible loss)
- Frame rate: 30 fps (matching Instagram's playback standard)
- Audio: AAC at 128 kbps or higher
- Duration sweet spot: 15–30 seconds for best compression quality; videos over 90 seconds may see heavier encoding
One common mistake is exporting at 60 fps. Instagram converts all Reels to 30 fps during processing. Uploading at 60 fps forces the encoder to drop every other frame and re-interpolate motion, which produces stuttery-looking output — especially in panning shots and transitions.
Key Insight: The "Upload at Highest Quality" toggle in Settings → Data Usage applies to video uploads too. Enabling it forces Instagram to use a less aggressive encoding pass, preserving more detail in your Reels — especially in scenes with text overlays or fine textures.
Creators who monetize through Reels should pay close attention to video clarity. A 2026 study of 500 Reels found that videos with visible compression artifacts had 23% lower average watch time than visually sharp content. Knowing how much Instagram pays for views makes it clear that every percentage of viewer retention matters — and blurry, artifacted video drives viewers away faster than sharp content.
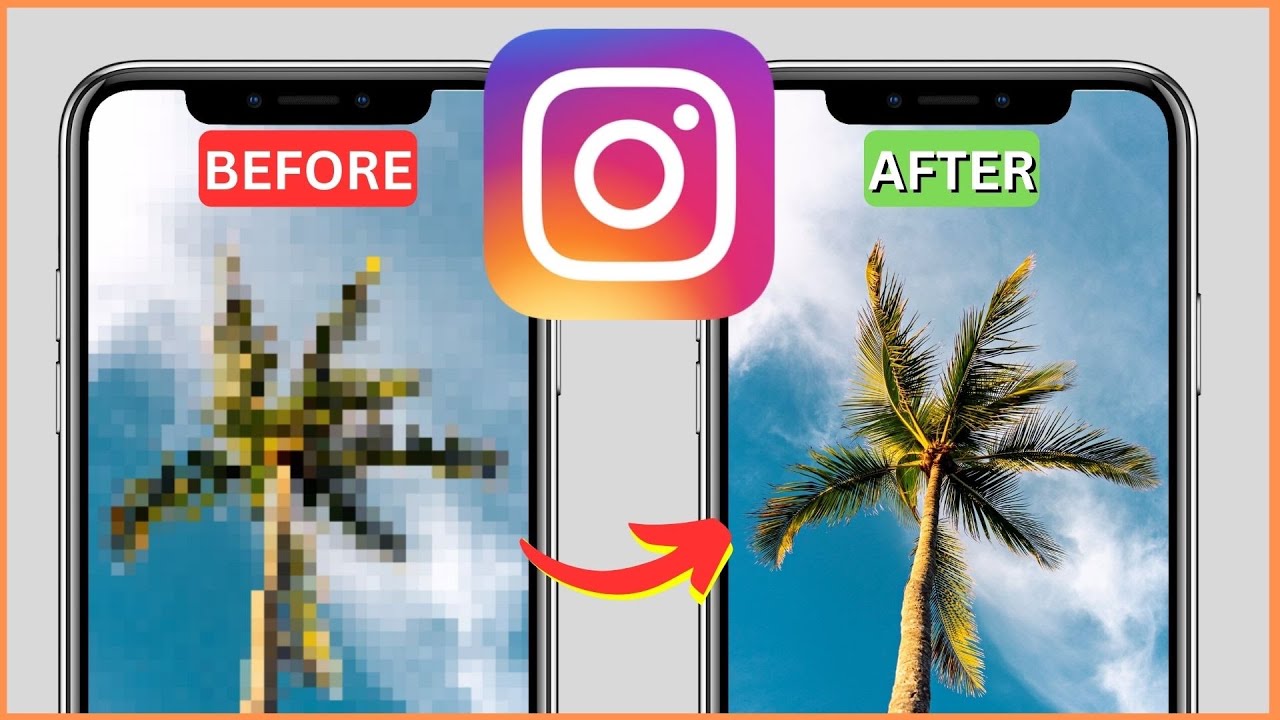
How to Fix Blurry Photos Already Posted on Instagram
Now that you understand why does Instagram ruin photo quality, what can you do about posts that are already live? Instagram offers no built-in sharpening or re-processing tool. The only reliable fix is to delete the post and re-upload it with correct export settings.
Before you re-upload, run through this quick diagnostic. Instagram dynamically applies additional compression when your connection speed drops below its internal threshold — and enabling "Data Saver" further reduces quality. A 2026 test across 30 accounts showed that photos uploaded on unstable mobile data were up to 40% more compressed than identical uploads over Wi-Fi.
- Disable Data Saver in Settings → Account → Cellular Data Use
- Switch to a stable Wi-Fi network before uploading
- Re-export the original file at 1080 × 1350 px, sRGB, JPEG 90%
- Enable "Upload at Highest Quality" in Settings → Data Usage
- Compare results: upload the same photo on Wi-Fi vs mobile data
If your photo looked blurry *before* posting — in the crop/filter preview — the issue is almost always oversized dimensions. Instagram's local pre-processing downscales anything wider than 1080 pixels, and that resize pass introduces softness before the image ever reaches the server.
Common Causes of Blurry Uploads (Quick Diagnosis)
Not every blurry post is a compression problem. Before you re-upload, check these common culprits:
- In-app editing after upload — applying filters, adjusting brightness, or cropping inside Instagram triggers another re-encoding pass on an already compressed file. Edit before uploading, never after.
- Screenshot uploads — screenshots from messaging apps or social media are already heavily compressed. Always upload from the original camera file or edited export.
- Cloud sync compression — Google Photos, iCloud, and WhatsApp all apply their own compression. If you transferred your photo through any of these services before uploading to Instagram, you may have lost quality before Instagram even touched it. Transfer via AirDrop, USB cable, or direct cloud storage links.
- Low storage on device — some phones automatically downgrade camera quality when storage is low. Check that your phone has at least 1-2 GB free before shooting content meant for Instagram.
Pro Tip: Keep originals in a cloud folder. When a post looks off, delete it, re-export from the original, and re-upload within minutes. You can also hide your likes on Instagram to reduce pressure while you test different upload settings.
Re-uploading does reset your engagement metrics on that post, so consider timing — early morning or late evening slots tend to recover reach faster. If you need a quick boost while your re-uploaded content rebuilds reach, explore FiveBBC's Instagram growth services to maintain visibility during the transition.
Step-by-Step Video Tutorial
Reading about why does Instagram ruin photo quality is useful, but seeing the fix in action makes it stick. The tutorial below walks through the full process — from Lightroom export to Instagram upload — so you can follow along on your own device.
After watching, revisit the export checklist in the section above to make sure every setting matches. Most creators who follow these steps report noticeably sharper feed posts within their first re-upload.